General Assembly
Today we'll be building a Wooden Wars horse and a
light cavalry Hussar. This tutorial provides some handy tips for assembly
basics that will cover most all standard cavalry types. Remember, Wooden Wars
is designed for children ages 8+, but should ALWAYS have parental supervision when assembling, especially when
sharp objects are involved!
Designer's note: I have updated many of the images with a yellow lettering instead of red, as per feedback. Apologies to my colorblind friends.
Designer's note: I have updated many of the images with a yellow lettering instead of red, as per feedback. Apologies to my colorblind friends.
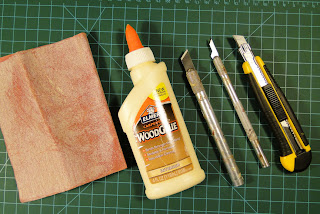
You will need a sharp knife, a suitable cutting surface,
some sandpaper and a bottle of carpenter's type wood glue. I find the chisel type
blades are best for cutting Wooden Wars pieces from their sprues.
The
Horse
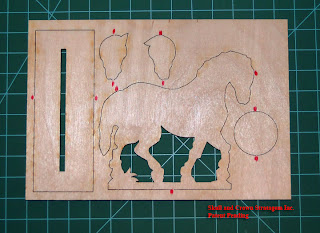
Horses are comprised of 4 basic parts: the body, two head
pieces and the base. There is also a Skull and Crown ™ coin which can be used
for reinforcement coins in the game, or ransom, or medals. Each model piece has 1 or 2 tabs. The horse body has 3
tabs.
I nick the back of the connecting tab first, then
cut all the way through from the front.
 |
| The coin can be uses for objectives or reinforcement coins. |
Remember to be very careful when handling the blade
and cut away from any fleshy parts!
After cutting the pieces, test fit everything, then
give the tabs a sanding.
They
Glue Horses don't they
 |
| use the "cheek" line on the horse as a guide for the head. |
Using a wood glue attach the head pieces. While the
glue is still wet, use your finger edge to line up the sides. I prefer the
“yellow” carpenter's glue. I stuck mine in one of those smaller "kid-size"
bottles for easy handling.
Basing
When fitting the horse into the base, test fit the
slot first. As there are sometimes subtle differences in the thickness of the
wood, it's best to make sure the piece fits well before gluing.
If necessary, sand the slot of the horse on the sides to make it thinner, then glue the
model firmly in place. On larger models
like horses I'll lean a couple of paint bottles up against them to keep them
true while drying.
The Hussar
Just like the horse, check the back of the sprue and
locate the tabs, then nick them with your blade, flip the model over and do the
same to the front, and remove the pieces.
You can in fact, remove many pieces from the sprue by
simply twisting them out- but this may cause the wood to splinter, and I don't recommend
it. Note you have different arms and hat
options, so noodle around with the pieces for a bit and see what you like best.
Set the saddle pieces and the carbine off to the side. We'll
assemble the rider first.
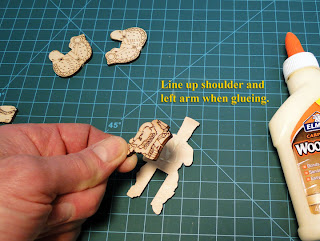
Take the back piece and glue it to the main body,
again lining up the edges with your finger. I use the shoulder as my guide
here. When this is dry enough, Glue on
the sword arm. If you wish to create an
elite Hussar, glue on the fur Busby style shako. Lastly glue on the plume.
Note: your
troops may take a pounding on the battle field, which sometimes causes plumes
to become unattached. If they do, simply glue them back on. or leave them off
as many real troopers did when going into battle.
Saddle up!
This may be the trickiest part of all Wooden Wars
models. Really!
The saddles center has a wide slot in which the
rider fits. Take one part of the saddle and apply glue below that line, then
attach to the horse with the back of the horse at or just below the slot. See
the images and look at where the red line is.
Once secure attach the other side
and line them up.
I find at this point It helps to take your rider and
place him in the saddle adjusting it forward or backward or up and down a bit
for best fit.
Lastly, with your rider in the saddle, take your
carbine and glue it to the right side saddle following the vertical strap. Note
how the carbine shape curves up and loosely "frames" the hussars body. It also
helps support him in the saddle when the rubber balls come flying!
Note: I
often base coat my horses before attaching saddles. I may even paint the
saddles first as well. It's entirely up to you.
Ready to Charge!
 |
| French 5th Elite Hussars |
That's all there is to it. Sit back and bask in your
glory! Now you can think about painting your suave hussar, or send him straight
out to capture the enemies flag, or attend a dance with a princess.


No comments:
Post a Comment